リストビューは、オペレーティングシステムが提供する最も精巧なコントロールの1つです。最も分かりやすい形としては、行と列の表形式で表示され、最も一般的な例としては、エクスプローラーのファイルやフォルダのリスト(詳細表示)があります。
ListViewは通常このような形をしています:
凝った作りになっていますが、ListViewの基本的な機能は簡単に使うことができます。ListViewを作成するための構文です:
LV := GuiObj.Add("ListView", Options, ["ColumnTitle1", "ColumnTitle2", "..."])
Or:
LV := GuiObj.AddListView(Options, ["ColumnTitle1", "ColumnTitle2", "..."])
ここでは、ユーザーの「My Documents」フォルダ内のファイルのリストを含むListViewを作成し、表示するスクリプトを紹介します:
; ウィンドウを作成します:
MyGui := Gui()

; NameとSizeの2つのカラムを持つListViewを作成します:
LV := MyGui.Add("ListView", "r20 w700", ["Name", "Size (KB)"])

; ユーザーが行をダブルクリックするたびに、スクリプトに通知する:
LV.OnEvent("DoubleClick", LV_DoubleClick)

; フォルダからファイル名のリストを集め、ListViewに入れる:
Loop Files, A_MyDocuments "\*.*"
    LV.Add(, A_LoopFileName, A_LoopFileSizeKB)

LV.ModifyCol()  ; Auto-size each column to fit its contents.
LV.ModifyCol(2, "Integer")  ; For sorting purposes, indicate that column 2 is an integer.

; ウィンドウを表示する:
MyGui.Show()

LV_DoubleClick(LV, RowNumber)
{
    RowText := LV.GetText(RowNumber)  ; Get the text from the row's first field.
    ToolTip("You double-clicked row number " RowNumber ". Text: '" RowText "'")
}
Background:単語Backgroundの直後に、色名(カラーチャート参照)またはRGB値(接頭辞0xは任意)を指定します。例:BackgroundSilver、BackgroundFFDD99。このオプションがない場合、ListViewの初期値はシステムのデフォルトの背景色になります。BackgroundDefaultまたは-Backgroundを指定すると、システムのデフォルトの背景色(通常は白)が適用される。例えば、LV.Opt("+BackgroundDefault")でListViewをデフォルトの色に戻すことができる。
C:テキストの色。文字Cの直後に、色名(カラーチャート参照)またはRGB値(接頭辞0xは任意)を指定します。例:cRed、cFF2211、c0xFF2211、cDefault。
チェック付き:各行の左側にチェックボックスを提供します。行を追加する際、そのオプションにCheckという単語を指定すると、スタートするボックスがチェックされていない状態ではなく、チェックされた状態になります。ユーザーは、チェックボックスをクリックするか、スペースバーを押して、行のチェックを入れたり外したりすることができます。
Count:Countの後に、ListViewが最終的に含む行の総数を指定します。これは制限ではありません:を超える行を追加することができます。その代わり、このオプションはコントロールへのヒントとして機能し、行を追加するたびにメモリを確保するのではなく、一度だけメモリを確保することができます。さらにパフォーマンスを向上させるには、大量の行を追加する前にLV.Opt("-Redraw")、追加後にLV.Opt("+Redraw")を使用します。詳しくは「再描画」をご覧ください。
Grid:行と列の境界を視覚的に示すための水平線と垂直線を提供します。
Hdr:ヘッダー(列のタイトルを含む特別な最上段)を省略する場合は、-Hdr(マイナスHdr)を指定します。後から見えるようにするには、LV.Opt("+Hdr")を使用します。
LV:文字列 LV の後に拡張リストビュースタイルの番号を指定する。これらのスタイルは、一般的な拡張スタイルとは全く別のものです。例えば、-E0x200を指定すると、汎用拡張スタイルWS_EX_CLIENTEDGEを削除して、コントロールのデフォルトボーダーをなくすことができます。一方、-LV0x20を指定すると、LVS_EX_FULLROWSELECTが削除される。
LV0x10:LV0x10を指定すると、ユーザーがカラムヘッダーを左右にドラッグして並び替えることができなくなります。しかし、列の物理的な並び替えは、スクリプトが見る列の順序に影響を与えないので、通常はこれを行う必要はありません。例えば、ユーザーが物理的に他の列の右に移動させたとしても、スクリプトから見て最初の列は常に列1です。
LV0x20:LV0x20を指定すると、行の最初のフィールドをクリックして選択する必要があります(通常は、どのフィールドをクリックしても選択されます)。この利点は、ユーザーが行のグループを選択するために矩形をドラッグすることが容易になることです。
Multi:-Multi(マイナスMulti)を指定すると、一度に複数の行を選択できないようにすることができます。
NoSortHdr:ヘッダーがクリックできないようにする。通常のボタンのような外観ではなく、平らな外観になります。他の多くのListViewスタイルと異なり、このスタイルはListViewの作成後に変更することができない。
NoSort:ユーザーがカラムヘッダをクリックしたときに発生する自動ソートをオフにします。However, the header will still behave visually like a button (unless the NoSortHdr option above has been specified). また、ColClickイベントは引き続き発生するので、スクリプトはカスタムソートなどのアクションで応答することができます。
ReadOnly:を指定します。各行の1列目のテキストの編集を許可する場合は、-ReadOnly(マイナスリードオンリー)を指定します。行を編集するには、行を選択してからF2キーを押します(下記のWantF2オプションを参照してください)。また、行を一度クリックして選択し、半秒以上待ってから同じ行をもう一度クリックすると、編集することができます。
R:高さの列(作成時)。Rの文字の後に、コントロール内のスペースを確保するための行数を指定します。例えば、R10とすると、コントロールは10列の高さになります。レポートビュー以外のビューモードでListViewを作成した場合、コントロールはテキストの列ではなく、アイコンの列に合うようにサイズ調整されます。注:ListViewの行にアイコンを追加すると、各行の高さが高くなるため、このオプションは不正確となります。
Sort:コントロールは、最初のカラムの内容に従ってアルファベット順にソートされた状態で保持されます。
SortDesc:降順以外は上記と同じ。
WantF2:F2が現在フォーカスしている行を編集できないようにするには、-WantF2(マイナスWantF2)を指定する。この設定は、-ReadOnlyも有効でない限り無視される。
(無名数字スタイル):上記以外のスタイルはほとんど使用されないため、名称を付けない。一覧はListViewのスタイルの表を参照してください。
ListViewには5つの表示モードがあり、その中で最も一般的なのはレポートビュー(これがデフォルト)です。他のビューを使用する場合は、オプションリストでその名前を指定します。また、ビューはコントロール作成後に変更することも可能です:LV.Opt("+IconSmall")。
Icon:大きなアイコンで表示されます。このビューおよびReport以外のビューでは、最初の列以外の列のテキストは表示されません。このモードでアイコンを表示するには、ListViewに大きなアイコンのImageListが割り当てられている必要があります。
Tile:大きなアイコンで表示されますが、各項目のテキストがアイコンの下ではなく右側に表示されるなど、人間工学的な違いがあります。このビューでは、チェックボックスは機能しません。
IconSmall:小さなアイコンで表示します。
List:アイコンを列挙して表示するリスト形式のスモールアイコンビューを表示します。列の数は、コントロールの幅と、その中で最も幅の広いテキストアイテムの幅に依存します。
Report:初期設定のレポートビューに切り替わります。事例:LV.Opt("+Report")。
GUIコントロールのデフォルトのメソッド/プロパティに加えて、ListViewコントロールは以下のメソッドを持ちます(Gui.ListViewクラスで定義)。
本ページで「行番号」と表記しているのは、ListView内の行の現在位置のことです。一番上の列が1、2番目の列が2、といった具合です。行が追加された後、他の行のソート、削除、挿入により、その行番号は変化する傾向があります。そのため、特定の行を内容から探すには、通常、ループ内でGetTextメソッドを使用するのが最適です。
列の方法:
Column methods:
検索方法:
その他の方法:
リストの一番下に新しい行を追加します。
RowNumber := LV.Add(Options, Col1, Col2, ...)
型:文字列
If blank or omitted, it defaults to no options. Otherwise, specify one or more options from the list below (not case-sensitive). 各オプションと次のオプションはスペースまたはタブで区切る。オプションを削除する場合は、オプションの前にマイナス記号を付けます。オプションを追加する場合は、プラス記号を使用することができますが、必須ではありません。
Check:ListViewにチェックボックスがある場合)行にチェックマークを表示します。後でチェックを外すには、LV.Modify(RowNumber, "-Check")を使用します。
Col:Colの後に、パラメータCol1以降の適用を開始する列番号を指定する。これは、Modifyメソッドで最もよく使われる方法で、左側にあるフィールドに影響を与えずに、行内の個々のフィールドを変更することができます。
Focus: Sets keyboard focus to the row (often used in conjunction with the Select option below). 後でフォーカスを外すには、LV.Modify(RowNumber, "-Focus")を使用します。
Icon:Iconという単語の直後に、この行のアイコンの番号を指定し、1列目の左側に表示される。このオプションがない場合、ImageListの最初のアイコンが使われます。空白のアイコンを表示する場合は、-1またはImageListのアイコンの数より大きい数を指定する。コントロールに小さいアイコンの ImageList がない場合、アイコンは表示されず、レポートビューにアイコンのためのスペースも確保されません。
The Icon option accepts a one-based icon number, but this is internally translated to a zero-based index; therefore, Icon0 corresponds to the constant I_IMAGECALLBACK, which is normally defined as -1, and Icon-1 corresponds to I_IMAGENONE. その他の範囲外の値でも、アイコンがあるはずの場所に空白ができることがあります。
Select:行を選択します。後で選択を解除するには、LV.Modify(RowNumber, "-Select")を使用します。行を選択する場合、少なくとも1つの行が常にフォーカスを持つようにしておくと、Appsキーがフォーカスを持つ行の近くにコンテキストメニューを表示できるようになるからです。Selectの後に、オプションとして、開始状態を示す0または1が続く場合がある。In other words, both "Select" and "Select" . VarContainingOne are the same (the period used here is the concatenation operator). This technique also works with the Focus and Check options above.
Vis:必要に応じて ListView をスクロールさせ、指定した行が完全に表示されるようにする。これはLV.Modifyにのみ効果があり、例えば以下のようなものがあります:LV.Modify(RowNumber, "Vis")。
型:文字列
新しい行の列で、テキストまたは数値(数値式の結果を含む)を指定することができます。任意のフィールドを空白にする場合は、""または同等のものを指定します。フィールドが少なすぎてすべての列を埋めることができない場合、末尾の列は空白になります。フィールドが多すぎる場合、末尾のフィールドは完全に無視されます。
Type: Integer
This method returns the new row number, which is not necessarily the last row if the ListView has the Sort or SortDesc style.
指定された行番号に新しい行を挿入する。
RowNumber := LV.Insert(RowNumber , Options, Col1, Col2, ...)
Type: Integer
新たに挿入された行の行番号。RowNumber以下の行は、新しい行のためのスペースを確保するために下方にシフトされます。RowNumberがリストの行数より大きい場合(2147483647でも)、新しい行はリストの末尾に追加されます。
型:文字列
If blank or omitted, it defaults to no options. Otherwise, specify one or more options from the list above.
型:文字列
新しい行の列で、テキストまたは数値(数値式の結果を含む)を指定することができます。任意のフィールドを空白にする場合は、""または同等のものを指定します。フィールドが少なすぎてすべての列を埋めることができない場合、末尾の列は空白になります。フィールドが多すぎる場合、末尾のフィールドは完全に無視されます。
Type: Integer
This method returns the specified row number.
行の属性やテキストを変更する。
LV.Modify(RowNumber , Options, NewCol1, NewCol2, ...)
Type: Integer
The number of the row to modify. If 0, all rows in the control are modified.
型:文字列
If blank or omitted, it defaults to no options. Otherwise, specify one or more options from the list above. Colオプションは、他の列に影響を与えずに特定の列を更新するために使用することができます。
型:文字列
指定された行の新しい列。テキストまたは数値(数値式の結果を含む)を指定することができる。任意のフィールドを空白にする場合は、""または同等のものを指定します。パラメータが少なすぎてすべての列をカバーできない場合、末尾の列は変更されません。フィールドが多すぎる場合、末尾のフィールドは完全に無視されます。
最初の2つのパラメータのみが存在する場合、行の属性のみが変更され、テキストは変更されない。
指定された行またはすべての行を削除する。
LV.Delete(RowNumber)
Type: Integer
If omitted, all rows in the ListView are deleted. Otherwise, specify the number of the row to delete.
指定されたカラムとそのヘッダーの属性とテキストを変更します。
LV.ModifyCol(ColumnNumber, Options, ColumnTitle)
Type: Integer
If this and the other parameters are all omitted, the width of every column is adjusted to fit the contents of the rows. This has no effect when not in Report (Details) view.
Otherwise, specify the number of the column to modify. 1列目は1(0ではない)です。
型:文字列
If omitted, it defaults to Auto (adjusts the column's width to fit its contents). Otherwise, specify one or more options from the list below (not case-sensitive). 各オプションと次のオプションはスペースまたはタブで区切る。オプションを削除する場合は、オプションの前にマイナス記号を付けます。オプションを追加する場合は、プラス記号を使用することができますが、必須ではありません。
一般的なオプションです:
N:Nに対して、列の新しい幅をピクセル単位で指定します。この数字は、唯一の選択肢であるならば、引用されないことも可能です。例えば、以下はどちらも有効です:LV.ModifyCol(1, 50)、LV.ModifyCol(1, "50 Integer")。
Auto:カラムの内容に合わせて、カラムの幅を調整します。This has no effect when not in Report (Details) view.
AutoHdr:カラムの幅を、そのコンテンツとカラムのヘッダーテキストのどちらか広い方に合うように調整します。最後のカラムに適用すると、ListViewの残りのスペースと同じ幅になるようにします。この設定は、行が追加された後に適用するのが一般的です。そうすることで、新たに到着した垂直スクロールバーを考慮して、最後の列のサイズを設定することができるからです。This has no effect when not in Report (Details) view.
Icon: Specify the word Icon followed immediately by the number of the ImageList's icon to display next to the column header's text. 既存のアイコンを削除する場合は、-Icon(マイナスアイコン)を指定します。
IconRight:アイコンを列の左側ではなく、右側に配置します。
データ型オプション:
Float:並べ替えのために、このカラムが浮動小数点数を含むことを示します(16進数形式はサポートされていません)。FloatとTextカラムのソート性能は、整数の場合と比べて最大25倍遅くなります。
Integer:並べ替えのために、このカラムが整数を含むことを示します。正しくソートするためには、各整数は32ビット、つまり-2147483648から2147483647の範囲内でなければなりません。値のいずれかが整数でない場合、ソート時にゼロとみなされます(ただし、数値で始まる場合は、その数値が使用されます)。数値は10進数または16進数(例:0xF9E0)で表示することができます。
Text:カラムをテキストモードでのソートに戻します(すべてのカラムの初期設定)。テキストの最初の8190文字だけが、ソートのために重要です(Logicalオプションを除く、その場合の制限は4094文字です)。
アライメントオプションです:
Center:カラム内のテキストをセンタリングします。IntegerまたはFloatの列をセンタリングするには、IntegerまたはFloatの後にCenterを指定します。
Left:カラムのテキストを左寄せにします。これは、すべてのカラムの初期設定値です。古いOSでは、1列目が強制的に左寄せになる場合があります。
Right:カラムのテキストを右寄せにします。IntegerおよびFloatカラムはデフォルトで右寄せになっているため、この属性を指定する必要はありません。このデフォルトは、"Integer Left"や"Float Center"などの指定で上書きすることができます。
ソートオプション:
Case:カラムのソートは大文字と小文字を区別します(テキストカラムにのみ影響します)。Case、CaseLocale、Logicalの各オプションが省略された場合、大文字のA〜Zは小文字と同一とみなされ、ソートが行われます。
CaseLocale:カラムのソートは、現在のユーザーのロケールに基づき、大文字と小文字を区別しません(テキストカラムにのみ影響します)。例えば、ほとんどの英語と西ヨーロッパのロケールでは、A-Zの文字とÄやÜなどのANSI文字が小文字と同じように扱われます。また、この方法では、「coop」と「co-op」のような単語が一緒になるようにハイフンやアポストロフィーを処理する「ワードソート」を使用しています。
Desc:降順。ユーザーが初めてソートするときは、列は降順で始まります。
Logical:CaseLocaleと同じですが、テキスト中の数字列が単なる文字ではなく、真の数字として扱われる点が異なります。例えば、文字列「T33」は「T4」よりも大きいと判断されるでしょう。Logicalと Caseは現在相互排他的です:直近で指定されたものだけが有効になります。
NoSort:このカラムをユーザーがクリックしても、自動的にソートされないようにします。しかし、ColClickイベントはまだ発生するので、スクリプトはカスタムソートなどのアクションで応答することができます。一部の列だけでなく、すべての列のソートを無効にするには、リストビューのオプションにNoSortを含めます。
Sort:カラムを即座に昇順でソートします(Descオプションがあっても)。
SortDesc:カラムをすぐに降順にソートします。
Uni:単方向のソートです。これにより、同じ列を2回目にクリックしても、ソートの方向が逆になることを防ぐことができます。
型:文字列
If omitted, the current header is left unchanged. Otherwise, specify the new header of the column.
指定されたカラム番号に新しいカラムを挿入します。
ColumnNumber := LV.InsertCol(ColumnNumber, Options, ColumnTitle)
Type: Integer
If omitted or larger than the number of columns currently in the control, the new column is added next to the last column on the right side.
Otherwise, specify the column number of the newly inserted column. ColumnNumberの右側にある列は、新しい列のために右側にシフトされます。1列目は1(0ではない)です。
型:文字列
If omitted, the column always starts off at its defaults, such as whether or not it uses integer sorting. Otherwise, specify one or more options from the list above.
型:文字列
If blank or omitted, it defaults to an empty header. Otherwise, specify the header of the column.
Type: Integer
This method returns the new column's position number.
新しく挿入された列は、それが最初の列でない限り、その下に何もない状態で始まり、その場合、古い最初の列の内容を引き継ぎ、古い最初の列は空白の内容を獲得する。
ListViewの最大列数は200列です。
指定された列とその下にあるすべてのコンテンツを削除する。
LV.DeleteCol(ColumnNumber)
Type: Integer
The number of the column to delete. 列が削除されると、その右側にある列の列番号は1つ減らされます。その結果、LV.DeleteCol(2)を2回呼び出すと、2列目と3列目が削除されます。
コントロールの行数または列数を返します。
Count := LV.GetCount(Mode)
型:文字列
If blank or omitted, the method returns the total number of rows in the control. Otherwise, specify one of the following strings:
S または Selected:カウントは選択/ハイライトされた行のみを含みます。
Col or Column: The method returns the number of columns in the control.
Type: Integer
This method returns the number of rows or columns in the control. The value is always returned immediately because the control keeps track of these counts.
This method is often used in the top line of a Loop, in which case the method would get called only once (prior to the first iteration). 事例:
Loop LV.GetCount()
{
    RetrievedText := LV.GetText(A_Index)
    if InStr(RetrievedText, "some filter text")
        LV.Modify(A_Index, "Select")  ; 最初のフィールドがフィルターテキストを含む各行を選択します。
}
ListViewのカラムの幅を取得し、INIファイルに保存してセッション間で記憶させるなどの使い方をする場合は、次のようにします:
Loop LV.GetCount("Column")
{
    ColWidth := SendMessage(0x101D, A_Index - 1, 0, LV)  ; 0x101D is LVM_GETCOLUMNWIDTH.
    MsgBox("Column " A_Index "'s width is " ColWidth ".")
}
次に選択、チェック、またはフォーカスされた行の行番号を返します。
RowNumber := LV.GetNext(StartingRowNumber, RowType)
Type: Integer
省略された場合、または1未満の場合は、リストの先頭から検索を開始します。Otherwise, specify the number of the row after which to begin the search.
型:文字列
If blank or omitted, the method searches for the next selected/highlighted row (see the example below). Otherwise, specify one of the following strings:
C or Checked: Find the next checked row.
F or Focused: Find the focused row. There is never more than one focused row in the entire list, and sometimes there is none at all.
Type: Integer
This method returns the row number of the next selected, checked, or focused row. If none is found, it returns 0.
次の例では、ListViewで選択されたすべての行をレポートします:
RowNumber := 0  ; This causes the first loop iteration to start the search at the top of the list.
Loop
{
    RowNumber := LV.GetNext(RowNumber)  ; 前の反復で見つかった行の次の行から検索を再開する。
    if not RowNumber  ; 上記は0を返したので、もう選択された行はない。
        break
    Text := LV.GetText(RowNumber)
    MsgBox('The next selected row is #' RowNumber ', whose first field is "' Text '".')
}
特定の行番号にチェックが入っているかどうかを調べる別の方法として、次のようなものがあります:
ItemState := SendMessage(0x102C, RowNumber - 1, 0xF000, LV)  ; 0x102C は LVM_GETITEMSTATE です。0xF000はLVIS_STATEIMAGEMASKです。
IsChecked := (ItemState >> 12) - 1  ; RowNumberがチェックされていればIsCheckedをtrueに、そうでなければfalseに設定します。
指定された行番号と列番号のテキストを取得する。
Text := LV.GetText(RowNumber , ColumnNumber)
Type: Integer
テキストを取得する行の番号。If 0, the column header text is retrieved.
Type: Integer
省略された場合、デフォルトは1(1列目のテキスト)です。Otherwise, specify the number of the column where RowNumber is located.
型:文字列
The method returns the retrieved text. Only up to 8191 characters are retrieved.
スクリプトが見る列番号は、ユーザーが行った列のドラッグ&ドロップによって変更されることはありません。例えば、ユーザーが他の列の右側にドラッグしても、元の1列目は1番のままです。
アイコンを表示するための ImageList を設定または置き換える。
PrevImageListID := LV.SetImageList(ImageListID , IconType)
Type: Integer
The ID number returned from a previous call to IL_Create.
Type: Integer
If omitted, the type of icons in the ImageList is detected automatically as large or small. Otherwise, specify 0 for large icons, 1 for small icons, or 2 for state icons (which are not yet directly supported, but could be used via SendMessage).
Type: Integer
This method returns the ImageList ID that was previously associated with the ListView. On failure, it returns 0. このような切り離されたImageListは、通常IL_Destroyで破棄する必要があります。
このメソッドは通常、ListViewに行を追加する前に呼び出されます。It sets the ImageList whose icons will be displayed by the ListView's rows (and optionally, its columns).
ListViewは、最大2つのImageListを持つことができます:small-iconおよびlarge-iconのいずれか、または両方を使用します。スクリプトでラージアイコン表示との切り替えが可能な場合に有効です。ListViewに複数のImageListを追加するには、2つ目のリストのImageList IDを指定して、SetImageListメソッドを2回呼び出します。大アイコンと小アイコンのImageListを持つListViewは、両方のリストに同じ順序でアイコンを含むことを保証する必要があります。これは、あるアイコンの大きいバージョンと小さいバージョンの両方を参照するために、同じID番号が使用されるためです。
アイコンとタイルを除くすべての表示モードでは、小さなアイコンを表示するのが伝統的ですが、SetImageListメソッドに大きなアイコンリストを渡し、第2パラメータに1(小さなアイコン)を指定することでこれをオーバーライドすることができます。また、ListViewの各行の高さを大きくして、大きなアイコンに合わせます。
OnEventを呼び出してコールバック関数やメソッドを登録することで、以下のイベントを検出することができます:
| イベント | 育てたのは... |
|---|---|
| Click | コントロールがクリックされます。 |
| DoubleClick | コントロールがダブルクリックされます。 |
| ColClick | カラムヘッダがクリックされます。 |
| ContextMenu | コントロールにキーボードフォーカスがある状態で、ユーザーがコントロールを右クリックするか、MenuまたはShift+F10を押した場合。 |
| Focus | コントロールがキーボードフォーカスを獲得します。 |
| LoseFocus | コントロールはキーボードフォーカスを失います。 |
| ItemCheck | 項目がチェックされているか、チェックされていないかの状態です。 |
| ItemEdit | アイテムのラベルは、ユーザーが編集します。 |
| ItemFocus | フォーカスされる項目が変わります。 |
| ItemSelect | 項目が選択または非選択になる。 |
OnNotifyを使用することで、追加の(ほとんど使用されない)通知を検出することができます。これらの通知については、Microsoft Docsで文書化されています。Microsoft Docsには、各通知コードの数値は掲載されていませんので、Windows SDKやインターネットで検索してご確認ください。
イメージリストは、メモリ上に保存された同一サイズのアイコンのグループです。作成時、各 ImageList は空である。スクリプトはIL_Addを繰り返し呼び出してアイコンをリストに追加し、各アイコンには1から始まる連番が割り当てられています。行や列のヘッダーに特定のアイコンを表示する際に、スクリプトが参照する番号です。ここでは、ListViewの行にアイコンを配置する方法を示す動作例を示します:
MyGui := Gui()  ; Create a Gui window.
LV := MyGui.Add("ListView", "h200 w180", ["Icon & Number", "Description"])  ; Create a ListView.
ImageListID :=IL_Create(10)  ; 小さなアイコンを10個保持するImageListを作成します。
LV.SetImageList(ImageListID)  ; 上記ImageListを現在のListViewに割り当てる。
Loop 10  ; DLLから一連のアイコンをImageListに読み込ませる。
    IL_Add(ImageListID, "shell32.dll", A_Index)
Loop 10  ; ListViewに行を追加する(デモのため、各アイコンに1つずつ)。
    LV.Add("Icon" . A_Index, A_Index, "n/a")
MyGui.Show()
Creates a new ImageList that is initially empty.
ImageListID := IL_Create(InitialCount, GrowCount, LargeIcons)
Type: Integer
省略しゃれたときは、初期値は2です。Otherwise, specify the number of icons you expect to put into the list immediately.
Type: Integer
省略しゃれたときは、初期値は5です。Otherwise, specify the number of icons by which the list will grow each time it exceeds the current list capacity.
型:論理値
省略されたときは、デフォルトはfalseです。
If false, the ImageList will contain small icons.
If true, the ImageList will contain large icons.
リストに追加されたアイコンは、大小のアイコンについてシステムの寸法に合わせて自動的に拡大縮小されます。
Type: Integer
On success, this function returns the unique ID of the newly created ImageList. On failure, it returns 0.
Adds an icon or picture to the specified ImageList.
IconIndex := IL_Add(ImageListID, IconFileName , IconNumber)
IconIndex := IL_Add(ImageListID, PicFileName, MaskColor, Resize)
Type: Integer
The ID number returned from a previous call to IL_Create.
型:文字列
The name of an icon (.ICO), cursor (.CUR), or animated cursor (.ANI) file (animated cursors will not actually be animated when displayed in a ListView), or an icon handle such as "HICON:" handle. その他、アイコンのソースとして、以下のような種類のファイルがあります:EXE、DLL、CPL、SCRなど、アイコンリソースを含むタイプ。
Type: Integer
If omitted, it defaults to 1 (the first icon group). Otherwise, specify the number of the icon group to be used in the file. If the number is negative, its absolute value is assumed to be the resource ID of an icon within an executable file. In the following example, the default icon from the second icon group would be used: IL_Add(ImageListID, "C:\My Application.exe", 2).
型:文字列
The name of a non-icon image such as BMP, GIF, JPG, PNG, TIF, Exif, WMF, and EMF, or a bitmap handle such as "HBITMAP:" handle.
Type: Integer
The mask/transparency color number. 0xFFFFFF (the color white) might be best for most pictures.
型:論理値
If true, the picture is scaled to become a single icon.
If false, the picture is divided up into however many icons can fit into its actual width.
Type: Integer
On success, this function returns the new icon's index (1 is the first icon, 2 is the second, and so on). On failure, it returns 0.
指定された ImageList を削除します。
IsDestroyed := IL_Destroy(ImageListID)
On success, this function returns 1 (true). On failure, it returns 0 (false).
ImageListはListViewに装着されると、ListViewまたはその親ウィンドウが破壊されたときに自動的に破壊されるため、通常は破壊する必要はない。しかし、ListViewが他のListViewとImageListを共有している場合(オプションに0x40を持つことによって)、スクリプトはそれを使用するすべてのListViewを破棄した後、明示的にImageListを破棄する必要があります。同様に、スクリプトがListViewの古いImageListの1つを新しいものに置き換える場合、古いものを明示的に破棄する必要があります。
Gui.Submitは、ListViewコントロールには効果がありません。
カラムがソートされた後(ユーザーがヘッダーをクリックするか、スクリプトがLV.ModifyCol(1, "Sort")を呼び出す)、その後に追加された行は、ソート順序に従わずにリストの一番下に表示されます。ただし、Sortと SortDescは例外で、新しく追加された行を正しい位置に移動させるスタイルです。
ListViewにフォーカスがある状態でユーザーがEnterを押したことを検出するには、デフォルトのボタンを使用します(必要に応じて非表示にすることができます)。事例:
MyGui.Add("Button", "Hidden Default", "OK").OnEvent("Click", LV_Enter)
...
LV_Enter(*) {
    global
    if MyGui.FocusedCtrl != LV
        return
    MsgBox("Enter was pressed. The focused row number is " LV.GetNext(0, "Focused"))
}
キーボードによる行から行への移動に加えて、ユーザーは最初の列の項目の最初の数文字を入力することによって、インクリメンタルサーチを行うこともできます。これにより、選択範囲は最も近い一致する行にジャンプします。
リストビューの各フィールドには任意の長さのテキストを格納することができますが、最初の260文字だけが表示されます。
ListViewの最大行数は利用可能なシステムメモリによってのみ制限されますが、Countオプションで説明するように、行追加のパフォーマンスを大幅に向上させることができます。
画像は、ListViewの周囲の背景として使用することができます(つまり、ListViewをフレーム化する)。リストビューの後にピクチャコントロールを作成し、ピクチャのオプションに0x4000000(WS_CLIPSIBLINGSです)を記述します。
スクリプトは、1つのウィンドウに1つ以上のListViewを作成することができます。
SendMessageで直接カラムの挿入や削除を行わない方がよいでしょう。これは、プログラムが各カラムのソート環境設定のコレクションを保持するためで、そうすると同期が取れなくなります。代わりに、組み込みのカラムメソッドを使用します。
リストビューのサイズ変更、非表示、フォント変更などの操作を行うには、GuiControlオブジェクトを参照してください。
外部のListView(スクリプトが所有していないもの)からテキストを抽出するには、ListViewGetContentを使用します。
TreeView、その他のコントロールタイプ、Gui()、ContextMenuイベント、Guiオブジェクト、GuiControlオブジェクト、ListViewのスタイルの表
行番号に0を指定して、すべての行を選択または非選択にします。
LV.Modify(0, "Select")   ; 全て選択
LV.Modify(0, "-Select")  ; 全てを選択から外します。
LV.Modify(0, "-Check")  ; 全てのcheckboxesを外します。
LV.ModifyCol() ; There are no parameters in this mode.
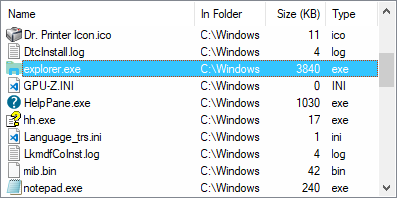
以下は、このページのトップ付近にあるスクリプトよりも、より精巧に作られたワーキングスクリプトです。ユーザーが選択したフォルダー内のファイルを表示し、各ファイルにはその種類に関連するアイコンが割り当てられます。ユーザーは、ファイルをダブルクリックするか、1つまたは複数のファイルを右クリックしてコンテキストメニューを表示することができます。
; GUIウィンドウを作成する:
MyGui := Gui("+Resize")  ; ウィンドウの最大化、ドラッグリサイズができるようにする。

; いくつかのボタンを作成します:
B1 := MyGui.Add("Button", "Default", "Load a folder")
B2 := MyGui.Add("Button", "x+20", "Clear List")
B3 := MyGui.Add("Button", "x+20", "Switch View")

; Create the ListView and its columns via Gui.Add:
LV := MyGui.Add("ListView", "xm r20 w700", ["Name", "In Folder", "Size (KB)", "Type"])
LV.ModifyCol(3, "Integer")  ; ソートのため、Size列が整数であることを示す。

; ListViewにアイコンを表示できるように、ImageListを作成する:
ImageListID1 := IL_Create(10)
ImageListID2 := IL_Create(10, 10, true)  ; 小さいアイコンと一緒に大きいアイコンのリストです。

; ListViewにImageListを貼り付けて、後でアイコンを表示できるようにする:
LV.SetImageList(ImageListID1)
LV.SetImageList(ImageListID2)

; コントロールイベントを適用する:
LV.OnEvent("DoubleClick", RunFile)
LV.OnEvent("ContextMenu", ShowContextMenu)
B1.OnEvent("Click", LoadFolder)
B2.OnEvent("Click", (*) => LV.Delete())
B3.OnEvent("Click", SwitchView)

; ウィンドウイベントを適用する:
MyGui.OnEvent("Size", Gui_Size)

; コンテキストメニューとして使用するポップアップメニューを作成します:
ContextMenu := Menu()
ContextMenu.Add("Open", ContextOpenOrProperties)
ContextMenu.Add("Properties", ContextOpenOrProperties)
ContextMenu.Add("Clear from ListView", ContextClearRows)
ContextMenu.Default := "Open"  ; 「Open」を太字にし、ダブルクリックでも同じことができることを示すようにする。

; ウィンドウを表示する:
MyGui.Show()

LoadFolder(*)
{
    static IconMap := Map()
    MyGui.Opt("+OwnDialogs")  ; メインウィンドウを使用する前に、以下のダイアログを強制的に解除させることができます。
    Folder := DirSelect(, 3, "Select a folder to read:")
    if not Folder  ; ユーザがダイアログをキャンセルした。
        return

    ; フォルダ名の最後の文字がバックスラッシュであるかどうかをチェックします。
    ; C:\などのディレクトリがあります。もしそうなら、後で二重のバックスラッシュを防ぐため、削除してください。
    if SubStr(Folder, -1, 1) = "\"
        Folder := SubStr(Folder, 1, -1)  ; 末尾のバックスラッシュを削除する。

    ; SHFILEINFO構造体に必要なバッファサイズを計算する。
    sfi_size := A_PtrSize + 688
    sfi := Buffer(sfi_size)

    ; 選択されたフォルダーからファイル名のリストを収集し、ListViewに追加する:
    LV.Opt("-Redraw")  ; ロード中の再描画を無効にすることでパフォーマンスを向上させる。
    Loop Files, Folder "\*.*"
    {
        FileName := A_LoopFilePath  ; 書き込み可能な変数に保存し、以下で使用する必要があります。

        ; 変数名に不正な文字が含まれないように、ユニークな拡張IDを構築する、
        ; ダッシュのようなまた、このユニークID方式は、アイテムを探す際に
        ; 配列の中の ;はサーチループを必要としない。
        SplitPath(FileName,,, &FileExt)  ; ファイルの拡張子を取得します。
        if FileExt ~= "i)\A(EXE|ICO|ANI|CUR)\z"
        {
            ExtID := FileExt  ; プレースホルダーとしての特別なIDです。
            IconNumber := 0  ; これらの型がそれぞれユニークなアイコンを持つことができるように、見つからないというフラグを立てる。
        }
        else  ; 他の拡張子/ファイルタイプなので、そのユニークIDを計算する。
        {
            ExtID := 0  ; 他より短い拡張子を扱うために初期化する。
            Loop 7  ; 64ビット値に収まるように、拡張子を7文字に制限する。
            {
                ExtChar := SubStr(FileExt, A_Index, 1)
                if not ExtChar  ; もう文字がない。
                    break
                ; 各文字に異なるビット位置を割り当てることで、ユニークなIDを導出する:
                ExtID := ExtID | (Ord(ExtChar) << (8 * (A_Index - 1)))
            }
            ; このファイル拡張子がすでにImageListsにアイコンを持っているかどうかをチェックします。もしそうであれば
            ; 何度も呼び出す必要がなく、ロードのパフォーマンスが大幅に向上します、
            ; 特に数百のファイルを含むフォルダの場合:
            IconNumber := IconMap.Has(ExtID) ? IconMap[ExtID] : 0
        }
        if not IconNumber  ; この拡張機能にはまだアイコンがないので、それを読み込む。
        {
            ; このファイル拡張子に関連する高品質のスモールアイコンを入手することができます:
            if not DllCall("Shell32\SHGetFileInfoW", "Str", FileName
            , "Uint", 0, "Ptr", sfi, "UInt", sfi_size, "UInt", 0x101)  ; 0x101はSHGFI_ICON+SHGFI_SMALLICONです。
                IconNumber := 9999999  ; 圏外に設定すると、空白のアイコンが表示されます。
            else ; アイコンの読み込みに成功しました。
            {
                ; 構造体からhIconメンバを抽出する:
                hIcon := NumGet(sfi, 0, "Ptr")
                ; HICONを直接スモールアイコン、ラージアイコンリストに追加する。
                ; Belowでは、返されたインデックスをゼロベースから1ベースに変換するために+1が使用されます:
                IconNumber := DllCall("ImageList_ReplaceIcon", "Ptr", ImageListID1, "Int", -1, "Ptr", hIcon) + 1
                DllCall("ImageList_ReplaceIcon", "Ptr", ImageListID2, "Int", -1, "Ptr", hIcon)
                ; ImageListsにコピーされたので、オリジナルは破棄してください:
                DllCall("DestroyIcon", "Ptr", hIcon)
                ; アイコンをキャッシュしてメモリを節約し、読み込みのパフォーマンスを向上させます:
                IconMap[ExtID] := IconNumber
            }
        }

        ; リストビューに新しい行を作成し、上記で決定したアイコン番号を割り当てる:
        LV.Add("Icon" . IconNumber, A_LoopFileName, A_LoopFileDir, A_LoopFileSizeKB, FileExt)
    }
    LV.Opt("+Redraw")  ; 再描画を有効にする(上記では無効になっている)。
    LV.ModifyCol()  ; 各カラムを内容に合わせて自動サイズアップする。
    LV.ModifyCol(3, 60)  ; Size列を少し広くして、ヘッダーを見せる。
}

SwitchView(*)
{
    static IconView := false
    if not IconView
        LV.Opt("+Icon")        ; アイコン表示に切り替えます。
    else
        LV.Opt("+Report")      ; 詳細ビューに切り替えます。
    IconView := not IconView   ; 次回に備え、反転させる。
}

RunFile(LV, RowNumber)
{
    FileName := LV.GetText(RowNumber, 1) ; 最初のフィールドのテキストを取得します。
    FileDir := LV.GetText(RowNumber, 2)  ; 2番目のフィールドのテキストを取得します。
    try
        Run(FileDir "\" FileName)
    catch
        MsgBox("Could not open " FileDir "\" FileName ".")
}

ShowContextMenu(LV, Item, IsRightClick, X, Y)  ; 右クリックまたはAppsキーに応答します。
{
    ; 指定された座標XとYにメニューを表示します。
    ; Appsキーを押しても正しい座標が表示されるからです:
    ContextMenu.Show(X, Y)
}

ContextOpenOrProperties(ItemName, *)  ; ユーザーがコンテキストメニューの「Open」または「Properties」を選択した。
{
    ; For simplicitly, operate upon only the focused row rather than all selected rows:
    FocusedRowNumber := LV.GetNext(0, "F")  ; Find the focused row.
    if not FocusedRowNumber  ; No row is focused.
        return
    FileName := LV.GetText(FocusedRowNumber, 1) ; 最初のフィールドのテキストを取得します。
    FileDir := LV.GetText(FocusedRowNumber, 2)  ; 2番目のフィールドのテキストを取得します。
    try
    {
        if (ItemName = "Open")  ; ユーザーはコンテキストメニューから「Open」を選択した。
            Run(FileDir "\" FileName)
        else
            Run("properties " FileDir "\" FileName)
    }
    catch
        MsgBox("Could not perform requested action on " FileDir "\" FileName ".")
}

ContextClearRows(*)  ; ユーザーがコンテキストメニューで「Clear」を選択しました。
{
    RowNumber := 0  ; これにより、最初の反復は先頭から検索を開始することになる。
    Loop
    {
        ; 行を削除すると、その下にある他のすべての行のRowNumberが減少するためです、
        ; 検索対象が、以前と同じ行番号になるように、1を引きます。
        ; 見つかった(隣接する行が選択された場合):
        RowNumber := LV.GetNext(RowNumber - 1)
        if not RowNumber  ; 上記は0を返したので、もう選択された行はない。
            break
        LV.Delete(RowNumber)  ; ListViewから行を消去します。
    }
}

Gui_Size(thisGui, MinMax, Width, Height)  ; ユーザーのサイズ変更に対応してListViewを拡大・縮小する。
{
    if MinMax = -1  ; ウィンドウは最小化されました。何もする必要はない。
        return
    ; それ以外の場合は、ウィンドウがリサイズまたは最大化されたことを意味します。それに合わせてListViewのサイズを変更します。
    LV.Move(,, Width - 20, Height - 40)
}