A TreeView displays a hierarchy of items by indenting child items beneath their parents. 最も一般的な例は、エクスプローラーのドライブとフォルダーのツリーである。
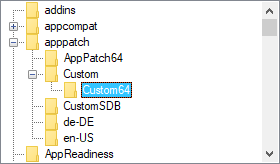
TreeViewは通常このような形をしている:
TreeViewを作成する構文は以下の通り:
TV := GuiObj.Add("TreeView", Options)
Or:
TV := GuiObj.AddTreeView(Options)
ここでは、アイテムの単純な階層を作成して表示するスクリプトを紹介する:
MyGui := Gui()
TV := MyGui.Add("TreeView")
P1 := TV.Add("First parent")
P1C1 := TV.Add("Parent 1's first child", P1)  ; Specify P1 to be this item's parent.
P2 := TV.Add("Second parent")
P2C1 := TV.Add("Parent 2's first child", P2)
P2C2 := TV.Add("Parent 2's second child", P2)
P2C2C1 := TV.Add("Child 2's first child", P2C2)

MyGui.Show()  ; Show the window and its TreeView.
Background:単語Backgroundの直後に、色名(カラーチャート参照)またはRGB値(接頭辞0xは任意)を指定します。例:BackgroundSilver、BackgroundFFDD99。このオプションが存在しない場合、TreeViewはシステムのデフォルトの背景色に初期設定されます。BackgroundDefaultまたは-Backgroundを指定すると、システムのデフォルトの背景色(通常は白)が適用される。例えば、TreeViewはTV.Opt("+BackgroundDefault")でデフォルトの色に戻すことができます。
Buttons:-Buttons(マイナスButtons)を指定すると、子アイテムを持つ各アイテムの左にプラスボタンやマイナスボタンが表示されなくなります。
C:テキストの色。文字Cの直後に、色名(カラーチャート参照)またはRGB値(接頭辞0xは任意)を指定します。例:cRed、cFF2211、c0xFF2211、cDefault。
Checked:各項目の左側にチェックボックスがあります。項目を追加する際、オプションにCheckという単語を指定すると、チェックされていないボックスではなく、チェックされたボックスが開始されます。ユーザーは、チェックボックスをクリックするか、スペースバーを押して、項目のチェックを入れたり外したりすることができます。TreeViewのどのアイテムが現在チェックされているかを調べるには、GetNextメソッドまたはGetメソッドを呼び出します。
HScroll: -HScroll(マイナスHScroll)を指定すると、コントロールの水平スクロールが無効になります(さらに、コントロールは水平スクロールバーを表示しません)。
ImageList:TreeViewにアイコンを追加する手段です。ImageListという語の直後に、以前にIL_Createをコールして返されたImageListIDを指定する。このオプションはTreeViewを作成するときにのみ効果があります(ただし、SetImageListメソッドには、この制限はありません)。以下はその例である:
MyGui := Gui()
ImageListID := IL_Create(10)  ; Create an ImageList with initial capacity for 10 icons.
Loop 10  ; Load the ImageList with some standard system icons.
    IL_Add(ImageListID, "shell32.dll", A_Index)
TV := MyGui.Add("TreeView", "ImageList" . ImageListID)
TV.Add("Name of Item", 0, "Icon4")  ; Add an item to the TreeView and give it a folder icon.
MyGui.Show()
Lines:親アイテムと子アイテムを結ぶ線のネットワークを表示しないようにするには、-Lines(マイナスLines)を指定します。しかし、これらの行を削除すると、トップレベルのアイテムにプラス/マイナスボタンが表示されなくなる。
ReadOnly: -ReadOnly(読み取り専用)を指定すると、各項目のテキストや名前の編集を許可する。項目を編集するには、項目を選択してからF2キーを押します(下記のWantF2オプションを参照)。あるいは、項目を一度クリックして選択し、少なくとも半秒待ってから同じ項目をもう一度クリックして編集することもできる。編集後の項目は、次の例に従って、その兄弟の中でアルファベット順に再配置することができます:
TV := MyGui.Add("TreeView", "-ReadOnly")
TV.OnEvent("ItemEdit", TV_Edit)  ; Call TV_Edit whenever a user has finished editing an item.
; ...
TV_Edit(TV, Item)
{
    TV.Modify(TV.GetParent(Item), "Sort")  ; This works even if the item has no parent.
}
R:高さの列(作成時)。Rの文字の後に、コントロール内のスペースを確保するための行数を指定します。例えば、R10はコントロールの高さを10にする。
WantF2: -WantF2(マイナスWantF2)を指定すると、F2が現在選択されている項目を編集できないようにする。この設定は、-ReadOnlyも有効でない限り無視される。
(無名数字スタイル):上記以外のスタイルはほとんど使用されないため、名称を付けない。一覧はTreeViewスタイルの表を参照。
GUIコントロールのデフォルトのメソッド/プロパティに加えて、TreeViewコントロールは以下のメソッドを持ちます(Gui.TreeViewクラスで定義)。
Item methods:
検索方法:
その他の方法:
TreeViewに新しいアイテムを追加します。
ItemID := TV.Add(Name, ParentItemID, Options)
型:文字列
テキストまたは数値(数値式の結果を含む)。
Type: Integer
If omitted, it defaults to 0, meaning the item will be added at the top level. Otherwise, specify the ID number of the new item's parent.
型:文字列
If blank or omitted, it defaults to no options. Otherwise, specify one or more options from the list below (not case-sensitive). 各オプションと次のオプションはスペースまたはタブで区切る。オプションを削除する場合は、オプションの前にマイナス記号を付けます。オプションを追加する場合は、プラス記号を使用することができますが、必須ではありません。
Bold:項目名を太字で表示します。後でアイテムのボールドを解除するには、TV.Modify(ItemID, "-Bold")を使用します。Boldの直後に、開始状態を示す0または1を続けることもできる。
Check:TreeViewにチェックボックスがある場合)アイテムの左にチェックマークを表示します。後でチェックを外すには、TV.Modify(ItemID, "-Check")を使用します。Checkの直後に、開始状態を示す0または1を続けることもできる。In other words, both "Check" and "Check" . VarContainingOne are the same (the period used here is the concatenation operator).
Expand:アイテムを展開し、その子アイテムを表示します。後でアイテムを折りたたむには、TV.Modify(ItemID, "-Expand")を使用します。子供がいない場合、Modify メソッドはアイテムの ID ではなく 0 を返します。対照的に、Addメソッドは、後でそのアイテムに子供が追加された場合に備えて、そのアイテムを拡張されたものとしてマークする。下の「選択」オプションとは異なり、項目を展開してもその親項目は自動的に展開されません。最後に、Expandの直後に、開始状態を示す0または1を続けることもできる。In other words, both "Expand" and "Expand" . VarContainingOne are the same.
First | Sort | N:これらのオプションはAddメソッドにのみ適用されます。新しいアイテムの位置は、その兄弟アイテム(兄弟アイテムとは、同じレベルにある他のアイテムのことです)との相対的な位置関係で指定されます。これらのオプションがない場合、新しい項目は最後/最下部の兄弟として追加されます。そうでない場合は、Firstという単語を指定して、その項目を最初の兄弟/一番上の兄弟として追加するか、Sortという単語を指定して、その項目をアルファベット順に兄弟の中に挿入する。プレーンな整数Nが指定された場合、それは新しい項目を挿入する兄弟のID番号とみなされる(Nが唯一のオプションの場合、引用符で囲む必要はない)。
Icon:Iconという単語と、アイテム名の左に表示されるこのアイテムのアイコンの番号を指定します。このオプションがない場合、ImageListの最初のアイコンが使われます。空白のアイコンを表示するには、ImageList のアイコンの数より大きい数を指定します。コントロールにイメージリストがない場合、アイコンは表示されず、アイコンのためのスペースも確保されません。
Select:項目を選択します。一度に1つの項目しか選択できないため、以前に選択されていた項目は自動的に選択解除される。さらに、このオプションは、必要に応じて、その親を展開することによって、新しく選択された項目を明らかにする。現在の選択範囲を知るには、GetSelectionメソッドを呼び出します。
Sort: Modify メソッドの場合、このオプションは、指定された項目の子をアルファベット順に並べ替えます。代わりにすべてのトップレベル項目をソートするには、TV.Modify(0, "Sort")を使用します。子供がいない場合は、変更された項目のIDの代わりに0が返される。
Vis:必要に応じて、TreeViewをスクロールしたり、親を展開したりして、アイテムが完全に表示されるようにします。
VisFirst:上記と同じですが、TreeViewもスクロールされ、可能であればアイテムが一番上に表示されます。このオプションは通常、AddメソッドよりもModifyメソッドで使用した方が効果的です。
Type: Integer
On success, this method returns the unique ID number of the newly added item. On failure, it returns 0.
多数のアイテムを追加する場合、アイテムを追加する前にTV.Opt("-Redraw")を使用し、その後にTV.Opt("+Redraw")を使用することでパフォーマンスを向上させることができる。詳細は「再描画」を参照。
アイテムの属性や名前を変更する。
ItemID := TV.Modify(ItemID , Options, NewName)
Type: Integer
The ID number of the item to modify.
型:文字列
If this and the NewName parameter is omitted, the item will be selected. Otherwise, specify one or more options from the list above.
型:文字列
省略された場合、現在の名前は変更されない。Otherwise, specify the new name of the item.
Type: Integer
This method returns the item's own ID.
指定された項目またはすべての項目を削除します。
TV.Delete(ItemID)
Type: Integer
省略された場合、TreeViewのすべてのアイテムが削除されます。Otherwise, specify the ID number of the item to delete.
選択された項目の ID 番号を返します。
ItemID := TV.GetSelection()
Type: Integer
This method returns the selected item's ID number.
コントロール内の項目の総数を返します。
Count := TV.GetCount()
Type: Integer
This method returns the total number of items in the control. The value is always returned immediately because the control keeps track of the count.
Returns the ID number of the specified item's parent.
ParentItemID := TV.GetParent(ItemID)
Type: Integer
The ID number of the item to check.
Type: Integer
This method returns the ID number of the specified item's parent. If the item has no parent, it returns 0, which applies to all top-level items.
指定された項目の先頭/末尾の子の ID 番号を返します。
ChildItemID := TV.GetChild(ItemID)
Type: Integer
The ID number of the item to check. If 0, the ID number of the first/top item in the TreeView is returned.
Type: Integer
This method returns the ID number of the specified item's first/top child. If there is no child, it returns 0.
指定された項目の上にある兄弟の ID 番号を返します。
PrevItemID := TV.GetPrev(ItemID)
Type: Integer
The ID number of the item to check.
Type: Integer
This method returns the ID number of the sibling above the specified item. If there is no sibling, it returns 0.
指定された項目の次の項目の ID 番号を返します。
NextItemID := TV.GetNext(ItemID, ItemType)
Type: Integer
If omitted, it defaults to 0, meaning the ID number of the first/top item in the TreeView is returned. Otherwise, specify the ID number of the item to check.
型:文字列
省略した場合は、指定した項目より下の兄弟のID番号を取得する。Otherwise, specify one of the following strings:
Full or F: Retrieves the next item regardless of its relationship to the specified item. This allows the script to easily traverse the entire tree, item by item. See the example below.
Check, Checked or C: Gets only the next item with a checkmark.
Type: Integer
This method returns the ID number of the next item below the specified item. If there is no next item, it returns 0.
次の例は、ツリー全体を項目ごとに走査するものである:
ItemID := 0  ; Causes the loop's first iteration to start the search at the top of the tree.
Loop
{
    ItemID := TV.GetNext(ItemID, "Full")  ; Replace "Full" with "Checked" to find all checkmarked items.
    if not ItemID  ; No more items in tree.
        break
    ItemText := TV.GetText(ItemID)
    MsgBox('The next Item is ' ItemID ', whose text is "' ItemText '".')
}
指定された項目のテキスト/名前を取得します。
Text := TV.GetText(ItemID)
Type: Integer
テキストを取得する項目のID番号。
型:文字列
This method returns the retrieved text. Only up to 8191 characters are retrieved.
Returns the ID number of the specified item if it has the specified attribute.
ItemID := TV.Get(ItemID, Attribute)
Type: Integer
The ID number of the item to check.
型:文字列
Specify one of the following strings:
E, Expand or Expanded: The item is currently expanded (i.e. its children are being displayed).
C, Check or Checked: The item has a checkmark.
B or Bold: The item is currently bold in font.
Type: Integer
If the specified item has the specified attribute, its own ID is returned. Otherwise, 0 is returned.
Since an IF-statement sees any non-zero value as "true", the following two lines are functionally identical: if TV.Get(ItemID, "Checked") = ItemID and if TV.Get(ItemID, "Checked").
アイコンを表示するための ImageList を設定または置き換える。
PrevImageListID := TV.SetImageList(ImageListID , IconType)
Type: Integer
The ID number returned from a previous call to IL_Create.
Type: Integer
省略したときの初期値は0です。Otherwise, specify 2 for state icons (which are not yet directly supported, but could be used via SendMessage).
Type: Integer
On success, this method returns the ImageList ID that was previously associated with the TreeView. On failure, it returns 0. このような切り離されたImageListは、通常IL_Destroyで破棄する必要があります。
OnEventを呼び出してコールバック関数やメソッドを登録することで、以下のイベントを検出することができます:
| イベント | 育てたのは... |
|---|---|
| Click | コントロールがクリックされます。 |
| DoubleClick | コントロールがダブルクリックされます。 |
| ContextMenu | コントロールにキーボードフォーカスがある状態で、ユーザーがコントロールを右クリックするか、MenuまたはShift+F10を押した場合。 |
| Focus | コントロールがキーボードフォーカスを獲得します。 |
| LoseFocus | コントロールはキーボードフォーカスを失います。 |
| ItemCheck | 項目がチェックされているか、チェックされていないかの状態です。 |
| ItemEdit | アイテムのラベルは、ユーザーが編集します。 |
| ItemExpand | アイテムが展開または折りたたまれている。 |
| ItemSelect | アイテムが選択されている。 |
OnNotifyを使用することで、追加の(ほとんど使用されない)通知を検出することができます。これらの通知については、Microsoft Docsで文書化されています。Microsoft Docsには、各通知コードの数値は掲載されていませんので、Windows SDKやインターネットで検索してご確認ください。
TreeViewにフォーカスがある状態でユーザーがEnterを押したことを検出するには、デフォルトのボタンを使用します(必要に応じて非表示にすることができます)。事例:
MyGui.Add("Button", "Hidden Default", "OK").OnEvent("Click", ButtonOK)
...
ButtonOK(*) {
    global
    if MyGui.FocusedCtrl != TV
        return
    MsgBox("Enter was pressed. The selected item ID is " TV.GetSelection())
}
キーボードで項目から項目へ移動するだけでなく、項目名の最初の数文字を入力してインクリメンタル検索を行うこともできる。これにより、選択項目は最も近い一致項目にジャンプする。
TreeViewの各項目には任意の長さのテキストを格納できるが、表示されるのは最初の260文字だけである。
TreeViewのアイテムの理論的な最大数は65536ですが、アイテム追加のパフォーマンスはそれよりもずっと前に顕著に低下します。これは、Addメソッドで説明した再描画のチップを使うことで、いくらか軽減できる。
ListViewとは異なり、TreeViewのImageListは、TreeViewが破棄されたときに自動的に破棄されることはありません。したがって、スクリプトはTreeViewのウィンドウを破棄した後にIL_Destroyを呼び出す必要があります。しかし、スクリプトがすぐに終了する場合は、その時点ですべてのImageListsが自動的に破棄されるため、この必要はありません。
スクリプトは、ウィンドウごとに複数のTreeViewを作成することができます。
TreeViewのサイズ変更、非表示、フォント変更などのアクションを実行するには、GuiControlオブジェクトを参照してください。
Tree View eXtension (TVX) はTreeViewを拡張し、移動、挿入、削除をサポートします。It is demonstrated at this archived forum thread.
ListView、その他のコントロールタイプ、Gui()、ContextMenuイベント、Guiオブジェクト、GuiControlオブジェクト、TreeViewのスタイルの表
以下は、このページのトップ付近にあるスクリプトよりも、より精巧に作られたワーキングスクリプトです。全ユーザーのスタートメニューにあるすべてのフォルダを含むTreeViewを作成し、表示します。ユーザーがフォルダを選択すると、その内容が(Windowsエクスプローラのように)右側のリストビューに表示されます。さらに、StatusBarコントロールは、現在選択されているフォルダに関する情報を表示します。
; The following folder will be the root folder for the TreeView. Note that loading might take a long
; time if an entire drive such as C:\ is specified:
TreeRoot := A_MyDocuments
TreeViewWidth := 280
ListViewWidth := A_ScreenWidth/2 - TreeViewWidth - 30

; Create the Gui window and display the source directory (TreeRoot) in the title bar:
MyGui := Gui("+Resize", TreeRoot)  ; ウィンドウの最大化、ドラッグリサイズができるようにする。

; Create an ImageList and put some standard system icons into it:
ImageListID := IL_Create(5)
Loop 5
    IL_Add(ImageListID, "shell32.dll", A_Index)
; Create a TreeView and a ListView side-by-side to behave like Windows Explorer:
TV := MyGui.Add("TreeView", "r20 w" TreeViewWidth " ImageList" ImageListID)
LV := MyGui.Add("ListView", "r20 w" ListViewWidth " x+10", ["Name", "Modified"])

; Create a Status Bar to give info about the number of files and their total size:
SB := MyGui.Add("StatusBar")
SB.SetParts(60, 85)  ; Create three parts in the bar (the third part fills all the remaining width).

; Add folders and their subfolders to the tree. Display the status in case loading takes a long time:
M := Gui("ToolWindow -SysMenu Disabled AlwaysOnTop", "Loading the tree..."), M.Show("w200 h0")
DirList := AddSubFoldersToTree(TreeRoot, Map())
M.Hide()

; Call TV_ItemSelect whenever a new item is selected:
TV.OnEvent("ItemSelect", TV_ItemSelect)

; Call Gui_Size whenever the window is resized:
MyGui.OnEvent("Size", Gui_Size)

; Set the ListView's column widths (this is optional):
Col2Width := 70  ; Narrow to reveal only the YYYYMMDD part.
LV.ModifyCol(1, ListViewWidth - Col2Width - 30)  ; Allows room for vertical scrollbar.
LV.ModifyCol(2, Col2Width)

; Display the window. The OS will notify the script whenever the user performs an eligible action:
MyGui.Show()

AddSubFoldersToTree(Folder, DirList, ParentItemID := 0)
{
    ; This function adds to the TreeView all subfolders in the specified folder
    ; and saves their paths associated with an ID into an object for later use.
    ; It also calls itself recursively to gather nested folders to any depth.
    Loop Files, Folder "\*.*", "D"  ; Retrieve all of Folder's sub-folders.
    {
        ItemID := TV.Add(A_LoopFileName, ParentItemID, "Icon4")
        DirList[ItemID] := A_LoopFilePath
        DirList := AddSubFoldersToTree(A_LoopFilePath, DirList, ItemID)
    }
    return DirList
}

TV_ItemSelect(thisCtrl, Item)  ; This function is called when a new item is selected.
{
    ; Put the files into the ListView:
    LV.Delete()  ; Clear all rows.
    LV.Opt("-Redraw")  ; ロード中の再描画を無効にすることでパフォーマンスを向上させる。
    TotalSize := 0  ; Init prior to loop below.
    Loop Files, DirList[Item] "\*.*"  ; For simplicity, omit folders so that only files are shown in the ListView.
    {
        LV.Add(, A_LoopFileName, A_LoopFileTimeModified)
        TotalSize += A_LoopFileSize
    }
    LV.Opt("+Redraw")

    ; Update the three parts of the status bar to show info about the currently selected folder:
    SB.SetText(LV.GetCount() " files", 1)
    SB.SetText(Round(TotalSize / 1024, 1) " KB", 2)
    SB.SetText(DirList[Item], 3)
}

Gui_Size(thisGui, MinMax, Width, Height)  ; Expand/Shrink ListView and TreeView in response to the user's resizing.
{
    if MinMax = -1  ; ウィンドウは最小化されました。何もする必要はない。
        return
    ; Otherwise, the window has been resized or maximized. Resize the controls to match.
    TV.GetPos(,, &TV_W)
    TV.Move(,,, Height - 30)  ; -30 for StatusBar and margins.
    LV.Move(,, Width - TV_W - 30, Height - 30)
}